Inspiration Gallery
Blog
Tile Calculator
08065423741



.svg)


Tile Vein Direction: How to Lay Marble-Look Tiles Without Making the Pattern Look Random
ByAditi Bardhan

Wed , Oct 21 , 2026

Read Time: 5 Min


 Copied!
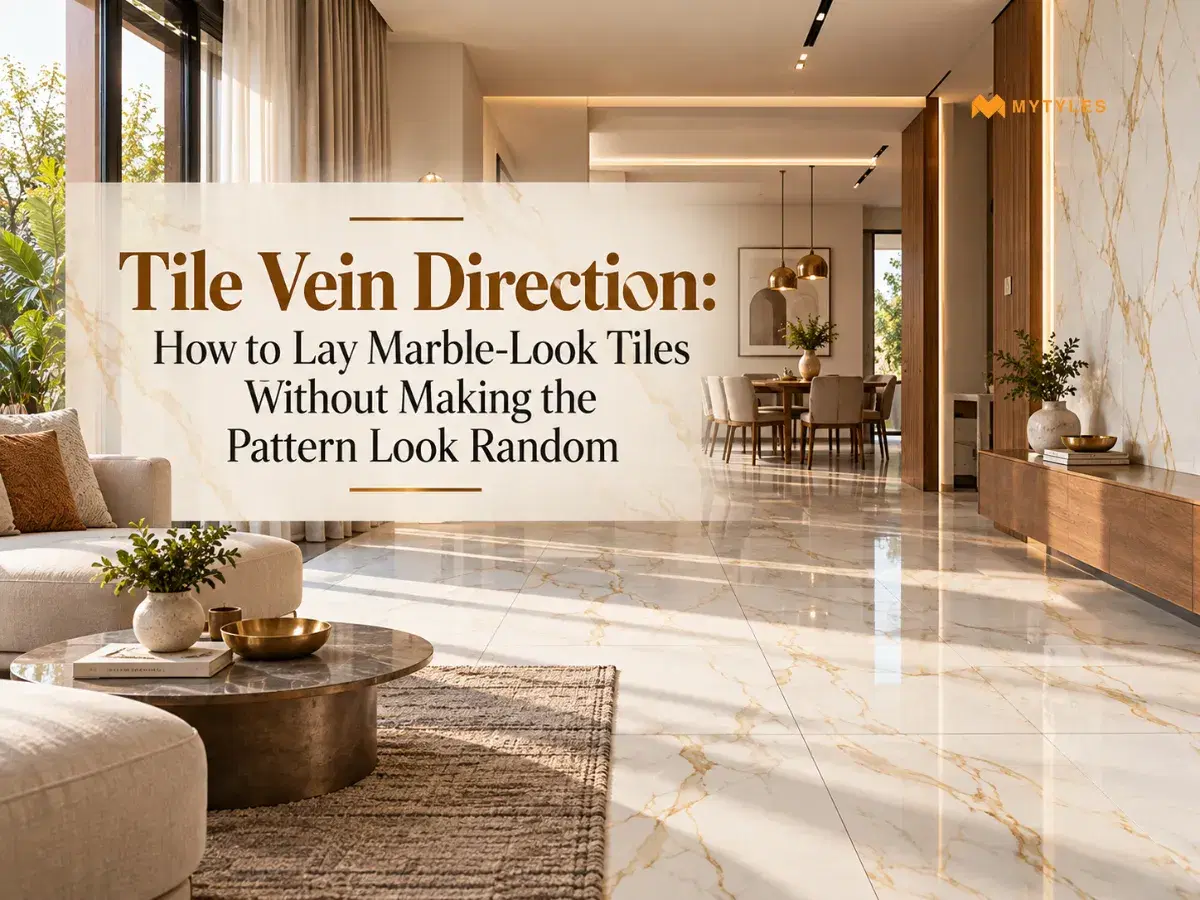
A single marble-look tile can look balanced on its own. The real test begins when several pieces sit together. Strong veins, repeated faces and random rotation can make the surface feel busier than expected if the layout is decided one tile at a time.
Marble look tiles reproduce marble-style veining on a tile surface. They are not natural marble. The number of faces, vein direction and intended sequence can vary by collection, so these details should be planned before installation.
What Does Tile Vein Direction Mean?

Tile vein direction is the way the main printed veins travel across the tile face. Some designs have one strong diagonal vein, while others use
branching lines, softer clouds or several lighter veins.
The stronger the marble veining pattern, the more noticeable the rotation becomes. A directional tile pattern does not mean every piece must run the same way, but the overall arrangement should be checked before fixing. When reviewing marble tile vein direction, stand at a normal viewing distance rather than focusing only on one joint.
Check How Many Tile Faces You Have
A marble tile look range may include several printed designs rather than one repeated graphic. These are often described as multiple tile faces. Open several boxes before installation. Look for repeated knots, dark veins, cloudy areas or other recognisable marks.
Tile face variation can reduce obvious repetition, but identical faces placed side by side may still stand out. With a strong marble-look tile
pattern, spread recognisable faces across the planned area where possible. Do not assume every piece will be different.
Dry-Lay the Pattern Before Fixing the Tiles
A dry-lay tile pattern gives you time to move pieces before adhesive makes the arrangement permanent.
Lay out the main visible section, then look for:
- repeated faces sitting too close together
- strong veins collecting in one area
- awkward V or zigzag shapes
- veins that stop suddenly at a joint
- pieces that read better when rotated
- important sections that may disappear after cutting
For a large floor or wall, photograph the approved arrangement so the order can be followed after the tiles are moved.
Plan How the Veins Will Move Across the Surface
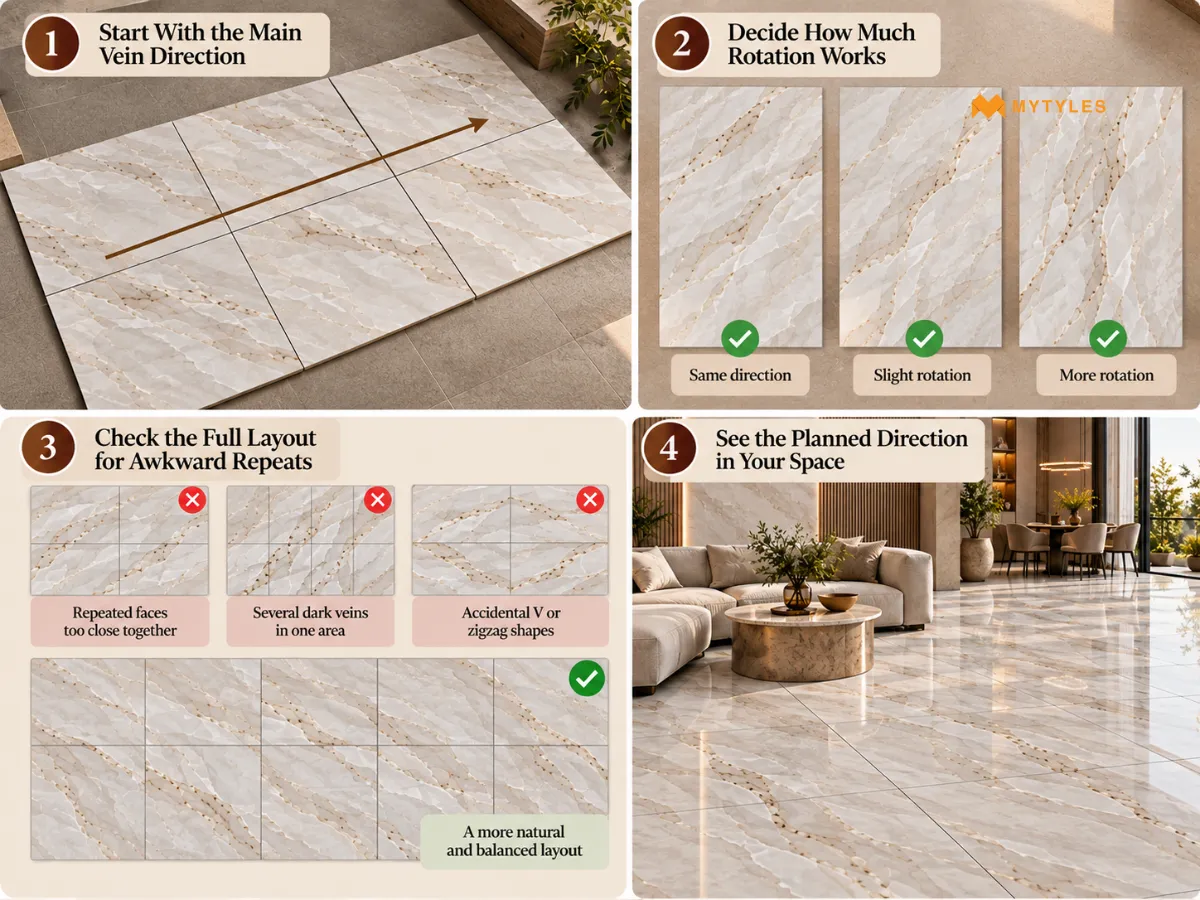
Once you have looked at the available tile faces, the next step is deciding how those veins should work together across the floor or wall. You do not need every line to connect, but the overall direction should look considered rather than accidental.
Start With the Main Vein Direction
There is no fixed rule saying veins must run towards a window or along the longest wall. Use the room itself as the guide.
For a marble look floor tile, look at the main entrance, passages, adjoining rooms and large furniture. A floor tile that looks like marble may read differently from the doorway than it does from the centre of the room.
For marble look tiles for wall applications, mark vanities, televisions, niches, shelves and switches first. This helps you see whether a strong
vein will remain visible or disappear behind a fitting.
Then Decide How Much Rotation Works
Once the main direction is clear, look at whether some pieces need to be turned. Not every vein has to run the same way. A strongly linear design may look more organised when most pieces follow a similar direction.
Softer marble effect tiles may allow more rotation, while a marble like tile with lighter veining may show less obvious directional change. Rotate tiles only after looking at the surrounding pieces. Turning them at random can create sudden changes in the pattern.
Check the Full Layout for Awkward Repeats
After the direction and rotation are planned, step back and look at several tiles together. This is where problems that are difficult to spot on a single piece usually become visible.
When working with vein matching tiles, watch for:
- Repeated faces sitting too close together
- Several dark veins collecting in one area
- Accidental V or zigzag shapes
- Mirrored shapes that were not intended
- Strong veins ending abruptly at nearby joints
The goal is not to make every line match. It is to make sure the overall pattern reads naturally across the complete surface.
If you are planning to install new marble-look tiles over an existing tiled surface, check the base before finalising the layout. Our guide on Can You Install Tile on Tile? A Complete Guide explains when this method may be possible and what needs to be checked first.
Bookmatch, Continuous Vein and Endless Vein Are Different
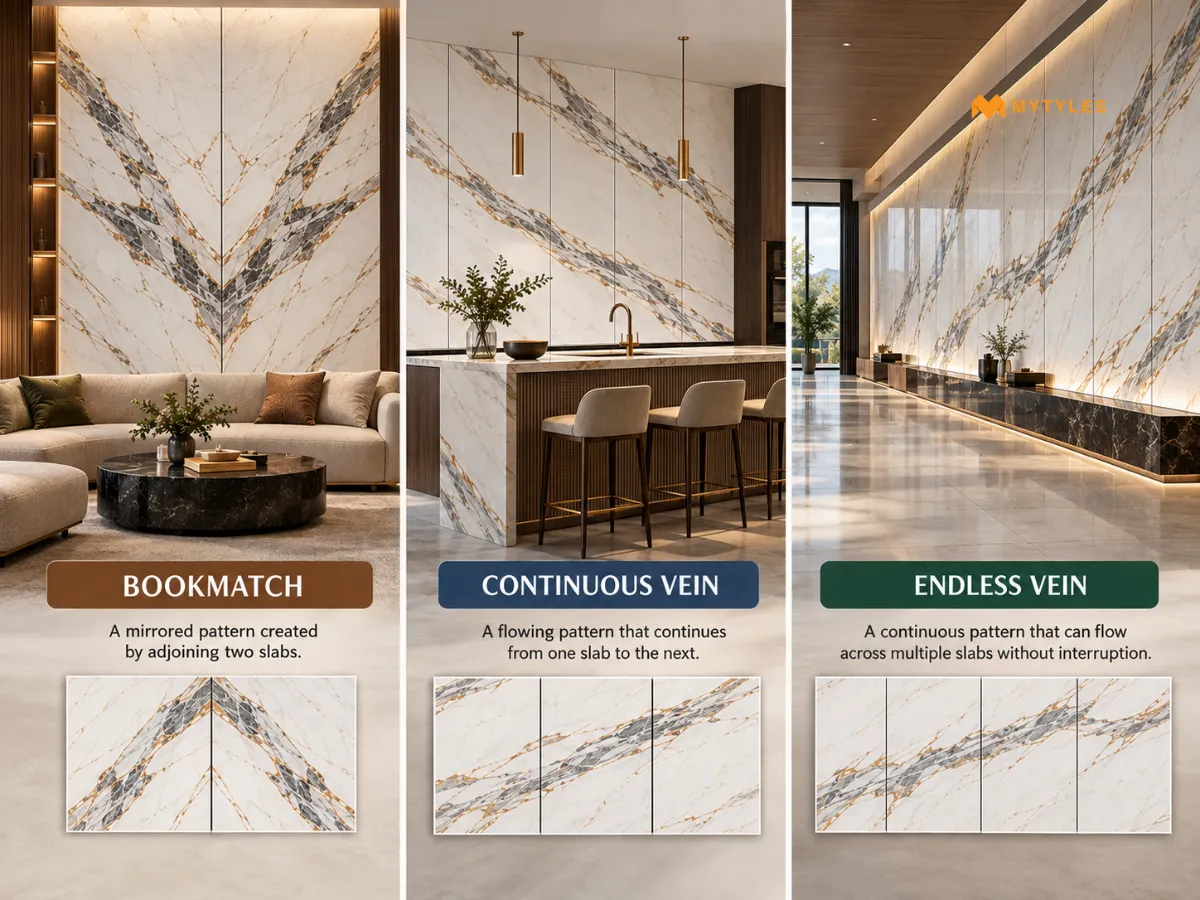
Not every tile that looks like marble is made to connect with the next piece. Some collections use mirrored faces, while others are designed for a continuing pattern. Knowing the difference helps avoid forcing a layout the tile was never designed to create.
Pattern Type | How It Works | What to Check |
| Bookmatch Tiles | Related faces mirror one another across a joint, creating a reflected pattern. | Check for A and B faces or a stated bookmatch sequence. Simply rotating ordinary marble-look tiles does not create a true bookmatch. |
| Continuous Vein Tiles | The graphic carries from one tile into the next in a planned order. | Follow the supplier’s sequence so the vein connects as intended across the surface. |
| Endless Vein Tiles | Some collections use this term for patterns designed to continue across several pieces and create a longer visual run. | Check the product-specific layout because the sequence and orientation can vary between collections. |
For all three, follow the supplier’s layout, orientation and sequence information before cutting or fixing the tiles.
Take Extra Care With Large-Format Marble-Look Tiles
Large-format marble-look tiles show more of the printed graphic on each piece, so vein placement, cuts and repetition become easier to notice.
Before installing a marble look porcelain tile or marble look vitrified tile, plan:
- Vein orientation
- Joint positions
- Cuts around openings
- Repeated faces
- Handling order
- The main visible section
Large formats also need suitable base preparation, flatness, adhesive coverage, joint planning and lippage control. These points should be discussed before the layout is finalised.
Check Orientation Arrows and Sequence Markings
Some tiles carry tile orientation arrows, numbers or other markings on the back. Do not assume every arrow means all pieces must point in the same direction.
Check the manufacturer's instructions. On a standard collection, the mark may relate to manufacturing orientation. On a matched series,
numbers or letters may identify the intended order. Keep box labels and sequence information until the layout is confirmed.
Let the Grout Support the Pattern
Grout colour changes how clearly each tile edge is seen. A shade close to the background may make the grid less obvious, while stronger contrast will outline every piece more clearly. Matching grout does not make the surface seamless. Joints remain part of the installation.
Choose grout colour after viewing several marble style tiles together, especially when the range contains both light and dark veining.
Common Mistakes That Make the Pattern Look Random
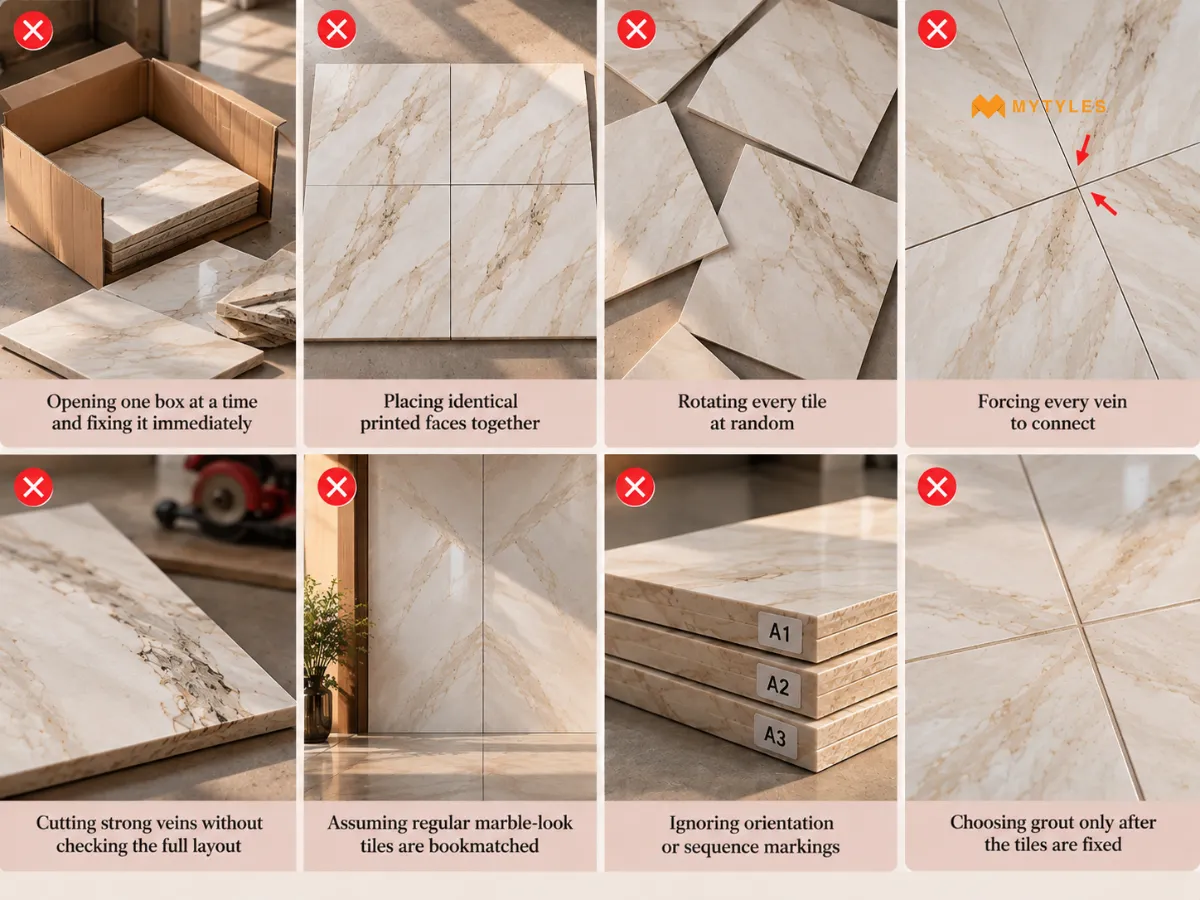
Most layout problems begin before installation. They often come from judging pieces one by one, ignoring repeated faces or starting the first row before the main direction has been considered.
Common mistakes to watch for include:
- Opening one box at a time and fixing it immediately
- Placing identical printed faces together
- Rotating every tile at random
- Forcing every vein to connect
- Cutting strong veins without checking the full layout
- Assuming regular marble-look tiles are bookmatched
- Ignoring orientation or sequence markings
- Choosing grout only after the tiles are fixed
Plan the Veins Before the First Tile Goes Down
A convincing marble-look surface does not need every vein to connect. What matters is that repetition, direction and major cuts look
considered rather than accidental.
Before installation, compare several faces, dry-lay the main area and follow any product-specific sequence. Browse marble-look tiles at MyTyles online or in the experience centre to compare formats, finishes and patterns before planning the final floor or wall layout.

Should all marble-look tile veins run in the same direction?

No. Some marble-look tiles read better when most veins follow one direction, while others can handle selected rotation. The right approach depends on the printed graphic and room layout. Dry-lay several pieces first, then check the pattern from a normal viewing distance before deciding how much variation works across the surface as a whole visually.
How do you arrange marble-look tiles so the pattern does not repeat?
Open several boxes before installation and compare the available tile faces. Separate obvious repeats where possible, then spread similar graphics across the layout instead of placing them side by side. A dry-lay also helps you spot repeated veins, dark clusters or accidental shapes before the tiles are fixed permanently in place on the finished surface.
What are multiple faces in marble-look tiles?
Multiple faces means a tile collection includes several printed graphics rather than one identical design repeated on every piece. The number of faces varies by product. More faces can reduce obvious repetition, but installers should still compare pieces before laying them, especially when strong veins or distinctive marks appear across several tiles within the area.
Should marble-look tiles be dry-laid before installation?
Dry-laying is useful because it lets you review vein direction, repeated faces and planned cuts before adhesive is applied. It is especially helpful with large-format marble-look tiles or strong marble veining patterns. Photographing the approved arrangement can also give the installer a clear reference once the pieces are moved for fixing on site properly and correctly.
Can any marble-look tile be bookmatched?
No. True bookmatch tiles use related faces designed to mirror one another across a joint. Rotating two ordinary marble-look tiles does not automatically create a bookmatched composition. Check the product information for A and B faces, matching sets or a stated bookmatch sequence before planning a mirrored wall or floor layout for your chosen surface.
How should marble-look tiles be arranged across doorways?
When marble-look tiles continue through doorways or into adjoining rooms, plan the vein direction before installation begins. Check where cuts will fall and whether the pattern changes direction at the threshold. A dry-lay can help you see whether the marble-look tile layout stays balanced across both spaces without forcing every vein to connect at the doorway.
What is the difference between continuous vein tiles and regular marble-look tiles?
Continuous vein tiles are produced so the graphic carries from one piece into the next in a planned sequence. Regular marble-look tiles may have several separate printed faces without any intended connection between them. Always check the supplier's layout instructions before trying to create a continuous pattern across multiple tiles or slabs in the installation.

ABOUT THE AUTHOR
Aditi Bardhan
Aditi Bardhan is a professional content writer with over five years of experience creating SEO-focused, research-backed content across diverse industries. She specialises in the tile and surface materials space, writing for homeowners, architects, interior designers, and trade professionals. Her work combines technical research, design awareness, and a strong understanding of customer needs, helping readers make clearer and more confident choices. Through her content, Aditi simplifies complex material concepts, highlights practical design benefits, and helps brands build trust and authority in the tile and construction industry.
Latest Blogs By MyTyles