Inspiration Gallery
Blog
Tile Calculator
08065423741



.svg)


Bathroom Waterproofing Before Tiling: What Happens Behind the Tiles?
ByNabiya Naqvi

Mon , Oct 12 , 2026

Read Time: 5 Min


 Copied!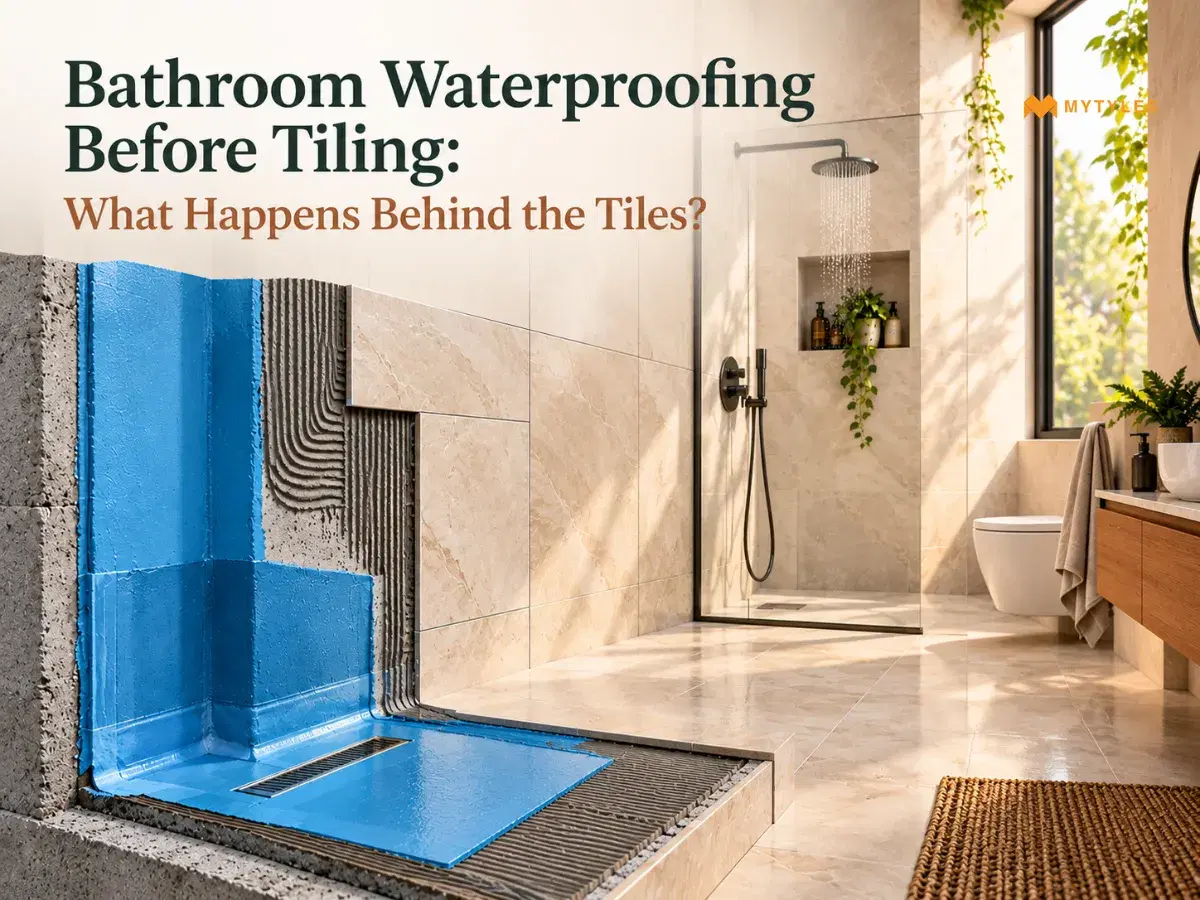
Bathrooms are the most moisture-prone environment in the house. Water runs down the walls and stays on the floor longer. There are water splashes and soap scum. The tiles are what you see once the bathroom is finished, but they are only one part of the installation. The tiled bathroom surface isn't waterproof on its own. So, what keeps water from reaching the surfaces behind them?
A waterproofing system, which includes a prepared substrate, primer where required, a waterproofing membrane, and compatible detailing around corners, joints, drains, and pipe penetrations.
This blog explains why wet area waterproofing is important, what sits behind your tiles, how the work happens, what it typically costs, and what to ask your contractor before the tiler arrives.
Why Is Bathroom Waterproofing Done Before Tiling?
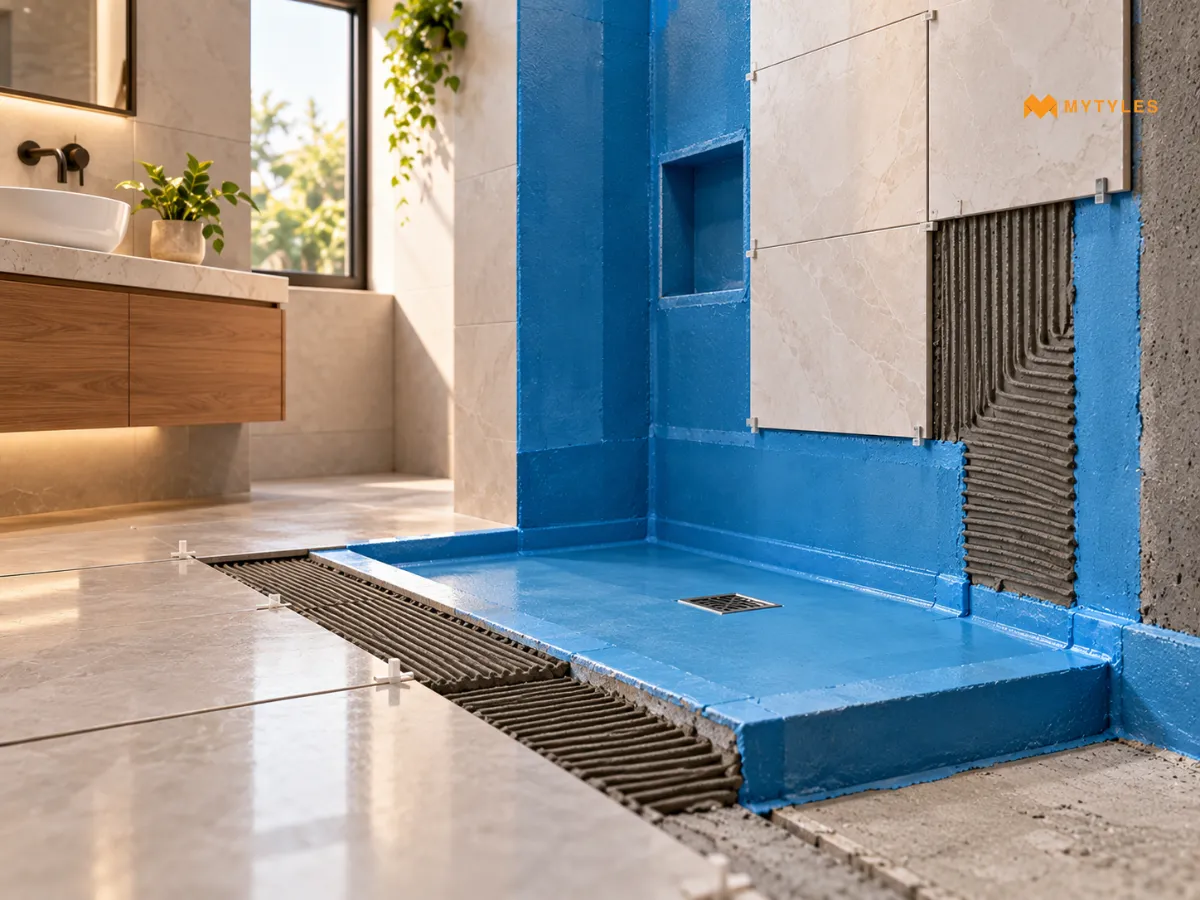
Ask why waterproofing goes on before the tiles, and most people give the same short answer. Water gets in otherwise. Bathroom waterproofing before tiling is about sequence and detail, not a single product applied once. A specific layer goes down in a specific order. It reaches the drain, the corners, and the wall-to-floor junction, and it must be finished and tested before a single tile is laid.
You can't add waterproofing under bathroom tiles later without breaking the finish, which is why waterproofing before tiling isn't a step anyone should skip or rush. Here is what sits behind bathroom tiles, which areas need the most attention, and how waterproofing, adhesive, grout, and sealant genuinely differ.
Types of Bathroom Waterproofing Systems
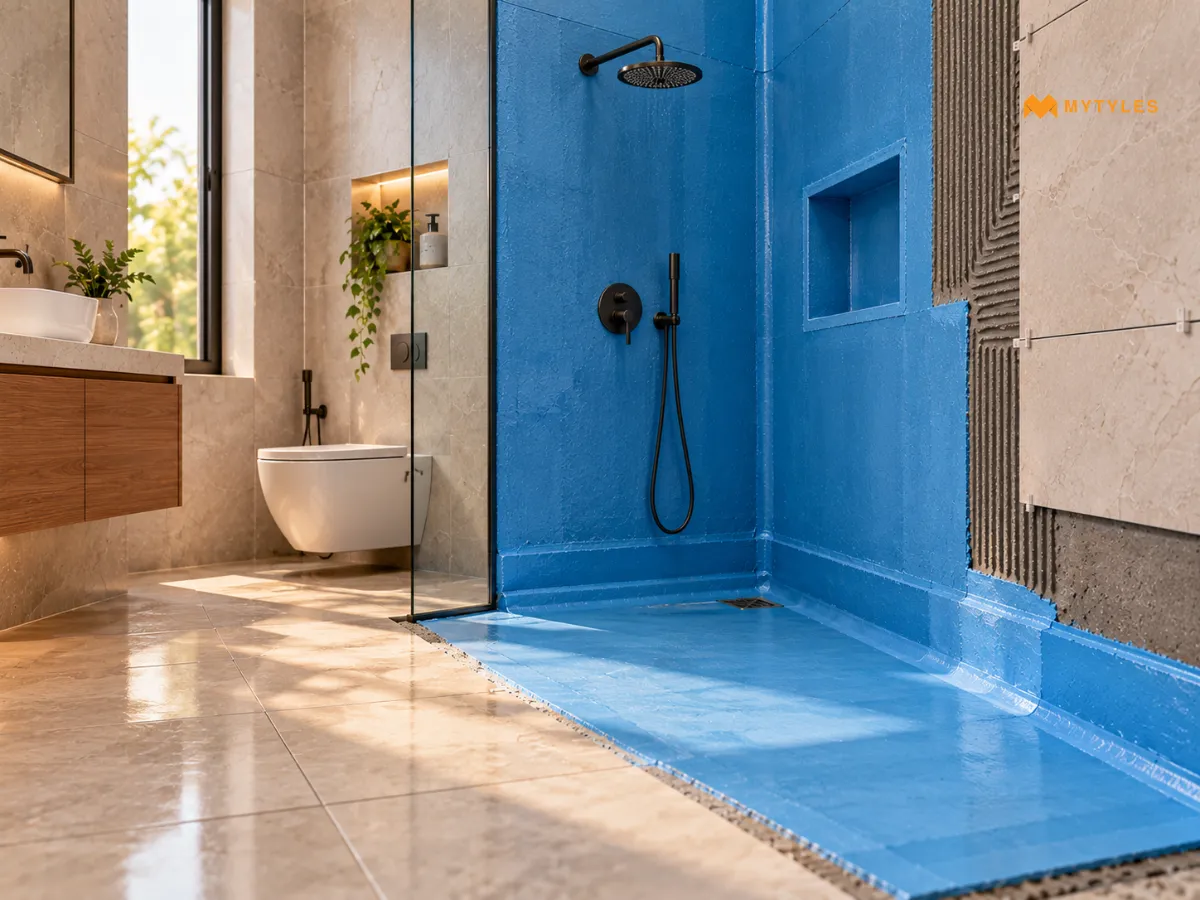
Not all bathrooms get waterproofed the same way. The right system depends on things like your substrate, the bathroom layout, and how much area needs covering. It helps to know the basics before you chat with your installer.
- Liquid Waterproofing Membrane: This one's painted or rolled on as a liquid, then left to form a waterproof layer under your tiles. How many coats do you need, how long it takes to dry, and how the tricky spots get sealed all come down to the specific product you use, so always follow the manufacturer's instructions.
- Cementitious Waterproofing: This is a cement-based mix that gets prepared and applied to the surface. It's often used on bathroom walls, floors, and other wet areas. Again, prep work, application, curing time, and tiling steps will differ depending on the product, so check the guidelines for whatever you're using.
- Sheet Waterproofing Membrane: Here, preformed waterproof sheets get fitted over the surface instead of a liquid or paste. Because you're working with sheets rather than a seamless coating, extra care is needed around seams, corners, joints, and any pipes or fittings. Again, the exact method depends on the manufacturer.
What Actually Goes Behind Bathroom Tiles?
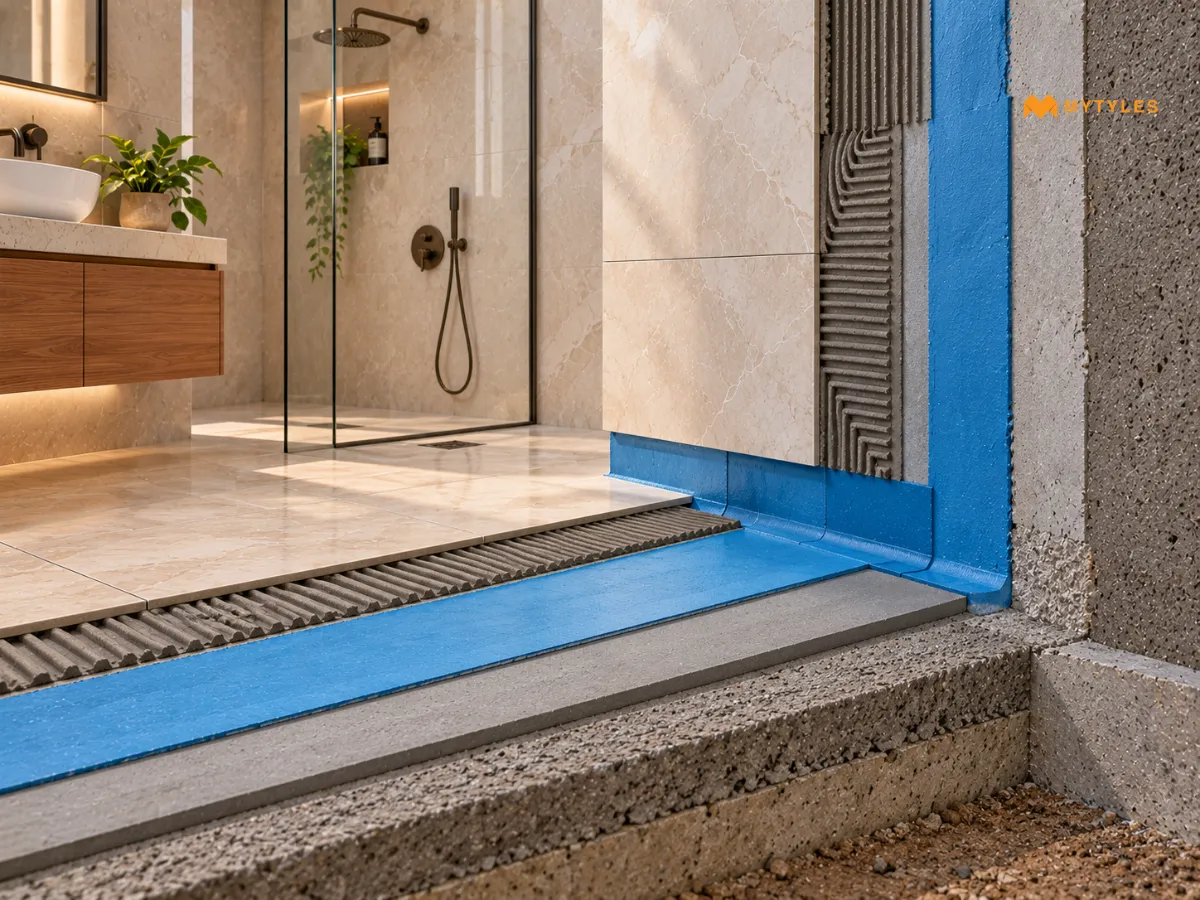
A finished bathroom wall or floor looks like one surface, but there are several layers underneath. Each has its own purpose. Here is a brief table showing what goes into a standard bathroom waterproofing process.
Layer | What It Does |
Substrate | Supports the tiled assembly |
Screed/Surface Preparation | Prepares levels and required floor falls where applicable |
Waterproofing System | Provides the specified water control layer |
Tile Adhesive | Bonds tiles to the prepared surface or system |
Tiles | Forms the visible finished surface |
Grout & Joint Treatment | Completes joints according to the installation requirements |
Note: The exact build-up depends on the substrate, the waterproofing system chosen, the bathroom design and the manufacturer's instructions, so treat this as the general order of work rather than a fixed formula for every bathroom.
Which Bathroom Areas Need the Most Attention?
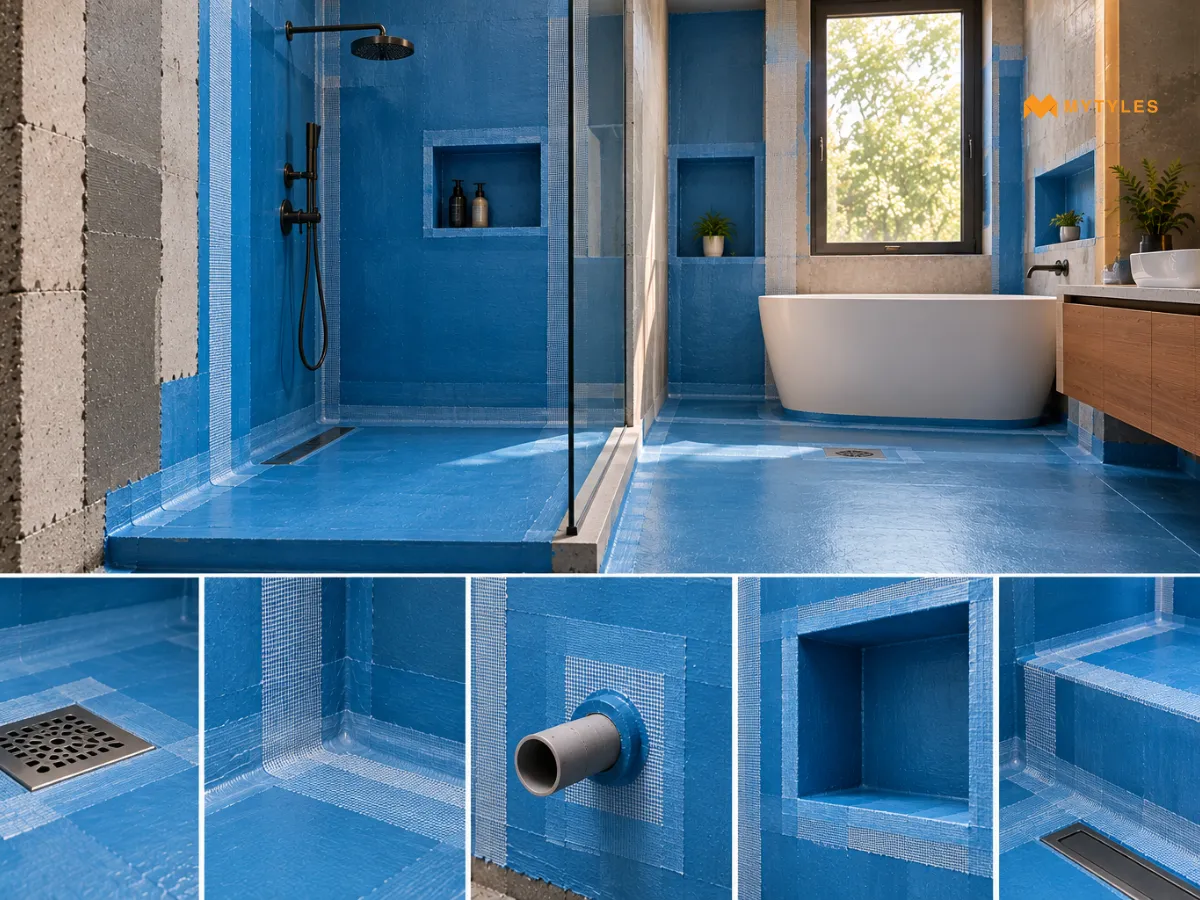
Although the bathroom is a moisture-prone area, some areas need extra attention for proper waterproofing before tiling. This includes shower areas, bath surrounds, wall-to-floor junctions, corners, pipe penetrations and niches.
- Shower floors may see standing water and direct spray far more often than the rest of the room. As a result, waterproofing requirements around the shower area may differ from other parts of the bathroom, depending on the selected waterproofing system, project specifications, and manufacturer’s installation instructions.
- Floor drains, wall-to-floor junctions, corners, and membrane seams require careful waterproofing detailing. Treat these areas according to the selected waterproofing system, project requirements, and the manufacturer’s installation instructions.
- So waterproofing around drains is critical. Corners work the same way. A straight run of membrane rarely fails. A rushed corner often does.
- Pipe penetrations, niches and ledges are smaller in area but no less important. A pipe passing through a slab, a recessed shelf built into a shower wall, or a ledge above a bath all break the waterproofing layer's continuity. Sealing pipe penetrations properly means treating each one individually, rather than assuming the main coat has already covered it.
What Happens Before the Waterproofing Layer Is Applied?
Choosing a beautiful tile that has wet-area suitability and slip-resistance properties for floors is the first step. But during installation, a lot needs to be done before the tile can be laid. Here, we have explained in brief what goes on before the waterproofing layer is applied:
- Get the Floor Slopes Right: When tiles are installed on bathroom floors, the floor needs to slope toward the drain. This slope is built into the cement layer, not the tile. It has to be correct at this stage, because a membrane and a tile bed will simply follow whatever level sits underneath them.
- Prepare the Surface: Surface preparation happens alongside this. Remove loose material, dust, and old coatings; fill cracks; and often form a small curved fillet where the wall meets the floor so the corner doesn't stay wet. Pipe openings and the drain body are sealed at this point too, since it is far easier to detail them on a bare substrate than to go back once tiling is underway.
- Understanding Damp Proofing and Waterproofing: It is also worth understanding damp proofing vs waterproofing here, since the two are often confused. Damp proofing slows moisture and vapour down. A waterproofing membrane for bathroom floors and walls has to hold back standing water and light pressure, which is what a shower floor deals with every day.
Note: The exact waterproofing method can vary. The membrane can be a liquid-applied, cementitious or sheet membrane, depending on the substrate and system chosen, along with compatible components for corners, penetrations and drains.
Waterproofing, Adhesive, Grout, and Sealant: What Is the Difference?
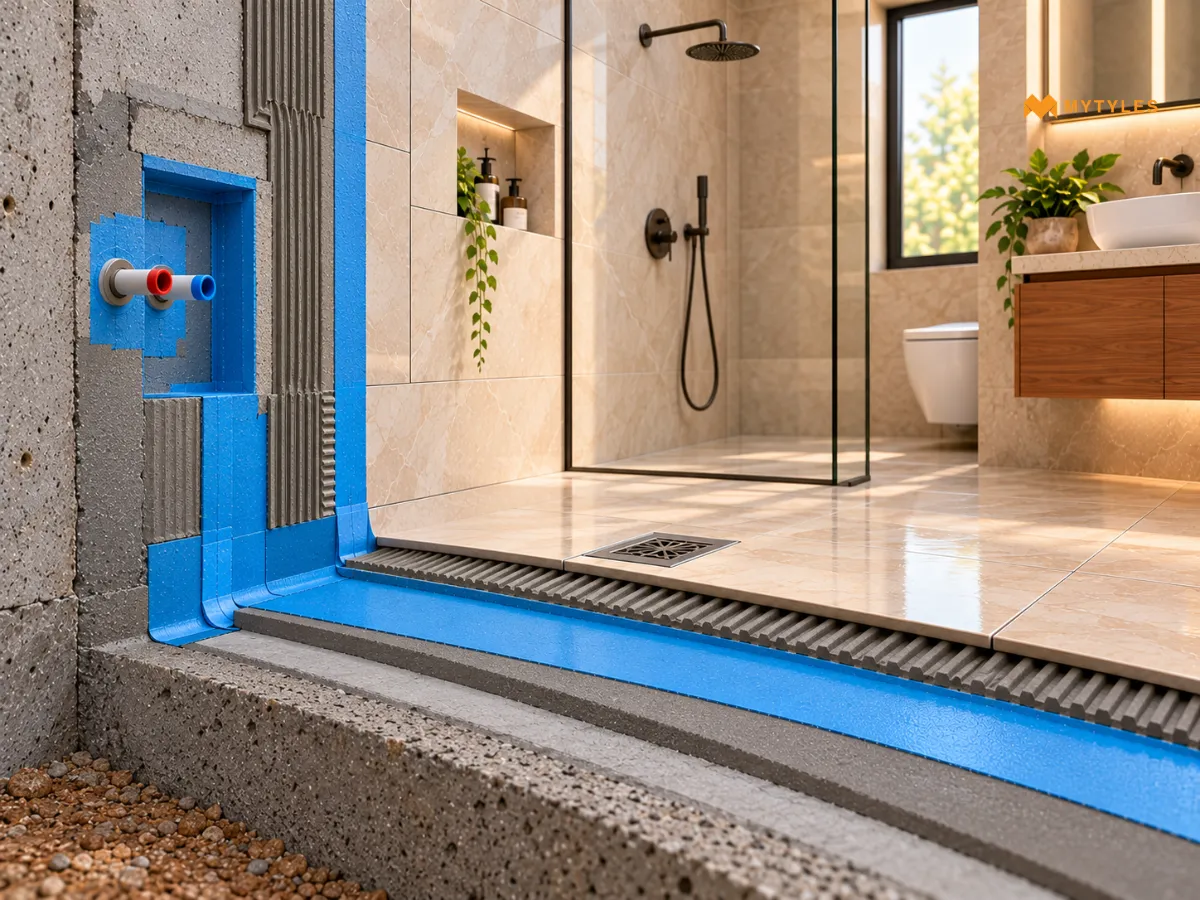
Waterproofing, adhesive, grout, and sealant are often considered interchangeable, but they are not. Each does a specific job, and none can substitute for another. Grout is the part most often mistaken for a waterproofing layer. It fills the gap between tiles and provides a finished look. But it isn't designed to keep water out on its own. That’s why the waterproofing membrane is installed at the specified position within the tiled assembly, rather than relying on tile joints as the waterproofing system. The exact build-up and membrane location depend on the selected system and installation requirements. Let’s clear up the misconception briefly:
Component | Primary Role |
Waterproofing system | Manages water penetration as part of the specified assembly |
Tile adhesive | Bonds the tile |
Grout | Fills joints between tiles |
Sealant/joint material | Treats designated joints according to the installation design |
Tile | Provides the finished surface |
Common Bathroom Waterproofing Mistakes Before Tiling
Focusing on the bathroom renovation is a good idea, but proper installation and a waterproofing system are just as important. Here is a look at common bathroom waterproofing mistakes to watch for before the tiles go on.
- Tiles and Grout: One of the most common mistakes is assuming that tiles or grout make up the waterproofing system. Neither is designed to carry that job on its own. Waterproofing under tiles has to be a complete, continuous layer. It cannot be partial and rely on the tile surface to finish the job.
- Inadequate Substrate Preparation: Problems may arise before laying the waterproofing system if the substrate isn't properly prepared.
- Incorrect Drainage Planning: The bathroom floor slope should be planned correctly so water can drain towards the intended outlet. If the slope is inadequate or incorrectly formed, water may collect in parts of the floor, which can affect drainage even when the waterproofing system is properly installed.
- Adhesive Compatibility: Getting tile adhesive over waterproofing wrong, by using a product not designed for the membrane underneath it, can loosen tiles in a way that looks like a leak but is not one.
- Starting tiling too early: Beginning tile installation before the waterproofing system has actually cured or passed required testing can create avoidable problems.
Plan the Waterproofing Before the Tiles Go On
Bathroom waterproofing is not something that starts with the tiles. The substrate, floor slope, drains, corners, pipe penetrations, waterproofing system, and installation sequence all need attention before the finished surface goes on. Waterproofing decides what a bathroom can safely become. Once you plan and specify it, the rest of the project – tile size, layout and finish – becomes a design decision rather than a structural one.
If you are at the tile stage of a bathroom project, browse the wall and floor tiles at MyTyles and check each listing for its rated application and slip resistance information before finalising your layout.

Are Bathroom Tiles And Grout Waterproof?

Tiles and grout should not be considered the complete waterproofing system. In areas regularly exposed to water, waterproofing is addressed as part of the installation behind the finished tile surface. The appropriate approach depends on the bathroom area, substrate, and waterproofing system being used.
Is Waterproofing Done Before Or After Bathroom Tiling?
Waterproofing intended to sit behind the tiled surface is applied before the finished tiles are installed. Where it fits within the overall preparation process depends on the selected waterproofing system and bathroom construction. Follow the specified installation sequence for the system being used rather than treating the tiles themselves as the waterproofing layer.
Can A Bathroom Be Waterproofed After Plastering?
It may be possible to apply certain waterproofing systems over plaster, but this depends on the type and condition of the plaster and the requirements of the selected product. If the walls have already been plastered, confirm that the existing surface is suitable for the waterproofing system before proceeding.
What Does Tanking A Bathroom Mean?
Bathroom tanking generally refers to waterproofing selected areas before the finished wall or floor covering is installed. Different tanking systems and materials are available, and the method used depends on factors such as the substrate, bathroom layout, areas exposed to water, and the selected waterproofing product.
Does The Entire Bathroom Need Waterproofing?
Not every part of a bathroom necessarily receives the same waterproofing treatment. Requirements depend on the bathroom layout, areas exposed to water, construction, and applicable project requirements. Shower areas, floors, junctions, and other areas regularly exposed to water should be considered when the waterproofing plan is prepared.
What Goes Between A Bathroom Wall And The Tiles?
What sits behind bathroom tiles depends on the wall construction and installation system. The build-up may involve a prepared substrate, waterproofing where required, tile adhesive, and the finished tile surface. Additional materials may also form part of a particular system, so there is no single build-up that applies to every bathroom.
What Factors Affect Bathroom Waterproofing Cost?
Bathroom waterproofing cost can vary based on the bathroom size, area being treated, substrate condition, waterproofing system, preparation required, labour, and project location. Additional detailing around drains, corners, and pipe penetrations may also affect the overall work involved. Ask for a project-specific estimate rather than relying on a single general rate.

ABOUT THE AUTHOR
Nabiya Naqvi
Nabiya Naqvi is a content writer with a postgraduate background in chemical sciences and a strong passion for creative expression. Her journey into writing began with a love for storytelling and gradually grew into a professional path focused on interiors, home decor, and design-led content. With a keen interest in beautiful living spaces, Nabiya enjoys simplifying design ideas and making them relatable for everyday readers. Through her writing, she blends creativity, research, and an eye for detail to help homeowners understand how tiles, textures, and thoughtful material choices can transform a space.
Latest Blogs By MyTyles